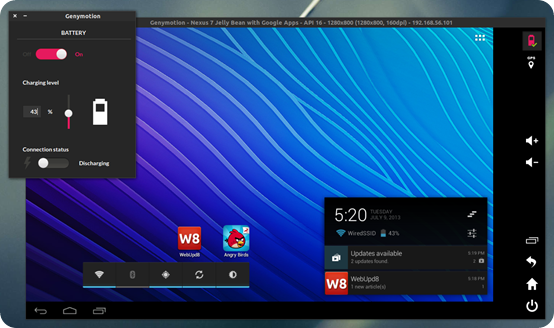
Genymotion linux - your place
Genymotion is a cross-platform android emulator, you can use it to create and run Android Virtual Devices (AVD) on a computer. It also offers some predefined virtual devices of Android phones and tablets.
Genymotion Android emulator is generally used by the android app developer to run and test their app using different virtual devices. It is easy to use, customizable, and very fast.
In this article, I will discuss how to install and use Genymotion on Linux operating system.
System requirements
To run the Genymotion android emulator on your Linux system you need to have the following things:
- Ubuntu 20.04LTS (Focal Fossa) – 64bit only OR
- Debian 9 (Stretch) or above – 64bit only OR
- Fedora 30 or above – 64bit only
- x86_64 CPU, with Intel VT-x/AMD-V/SVM
- Hardware-accelerated GPU
- Minimum 400 MB disk space
- 4GB RAM
- VirtualBox from your distribution
Prerequisites
- You should have a user account with superuser privileges.
- You need to create an account on Genymotion keep the credentials you need to log in after the installation of Genymotion.
Install VirtualBox in Linux
Genymotion uses VirtualBox to virtualize the android operating system on Ubuntu. So first you need to install VirtualBox on your system.
The easiest way to install VirtualBox on Ubuntu or in a Debian-based system is to download it from the operating system’s repository.
Update your local package database by using –
sudo apt updateAnd then use the given command to install VirtualBox –
sudo apt install virtualbox -yFor detailed installation instructions, you can read how to install VirtualBox in Ubuntu.
You need to follow separate instructions for the installation of VirtualBox in Fedora or any other RPM-based Linux distribution.
Download Genymotion for Linux
Go to the official website of Genymotion in the Resources section go to click on Download this will bring you to the download page of Genymotion.

Click on the Download for Linux(64bit) this will download the Genymotion installer. This file is not executable by default as you can see in the image below.

To make it executable, use the given command in your terminal –
chmod +x ~/Downloads/genymotion-3.2.1-linux_x64.binNow after making it executable, use the given command to run the installer –
sudo ~/Downloads/genymotion-3.2.1-linux_x64.binThis will ask for confirmation that do you want to make your installation directory. Press y and then enter to proceed with the installation process.

Start the Genymotion application
Go to the Activities dashboard and search for Genymotion when the icon appears click on it to start the application.

When the emulator starts it will ask you to enter the login credentials.

Enter your email and password of Genymotion account and click on Next to login. On the next screen choose Personal Use and again click on the Next.
Now this will display the END USER LICENCE AGREEMENT (EULA) here tick the check box and click on the Next.

Now finally you will see the user interface of this application. Now you can install an AVD and use it to run an Android application.
Install an Android Virtual Device
Now to create an AVD click on + given on the right-hand upper side.

Now you can choose one of the given devices and install it for use. Choose a device and then click on Next.

Once the installation of an AVD is complete click on the Start to start it. Now you can install android applications on your virtual device.

Conclusion
You have successfully installed Genymotion player on Linux you can install android apps using files or through the Google Play store.
Now for any query write us in the comments below.
Related
In this article, I am going to show you how to install Genymotion Android Emulator on Ubuntu 18.04 LTS. So, let’s get started.
Installing VirtualBox:
Genymotion uses VirtualBox to run the Android emulator on your computer. So, you must have hardware virtualization (VT-d/VT-x/AMD-v) enabled in your BIOS and VirtualBox installed in order to use Genymotion.
VirtualBox is available in the official package repository of Ubuntu 18.04 LTS. So, you can easily install it using the APT package manager.
First, update the APT package manager cache as follows:
$ sudo apt update
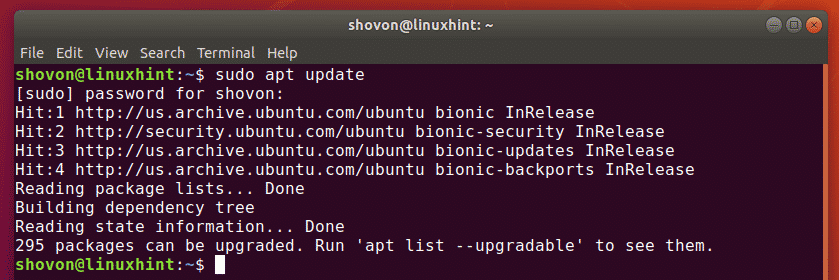
Now, install VirtualBox with the following command:
$ sudo apt install virtualbox

Now, press y and then press <Enter> to confirm the installation.
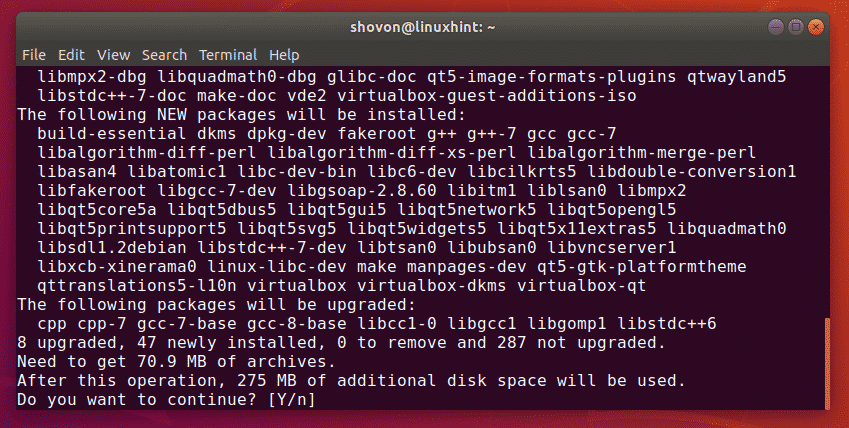
VirtualBox should be installed.
Downloading Genymotion:
Genymotion is not available in the official package repository of Ubuntu 18.04 LTS. But, you can easily download Genymotion from the official website of Genymotion and install it on your Ubuntu 18.04 LTS machine.
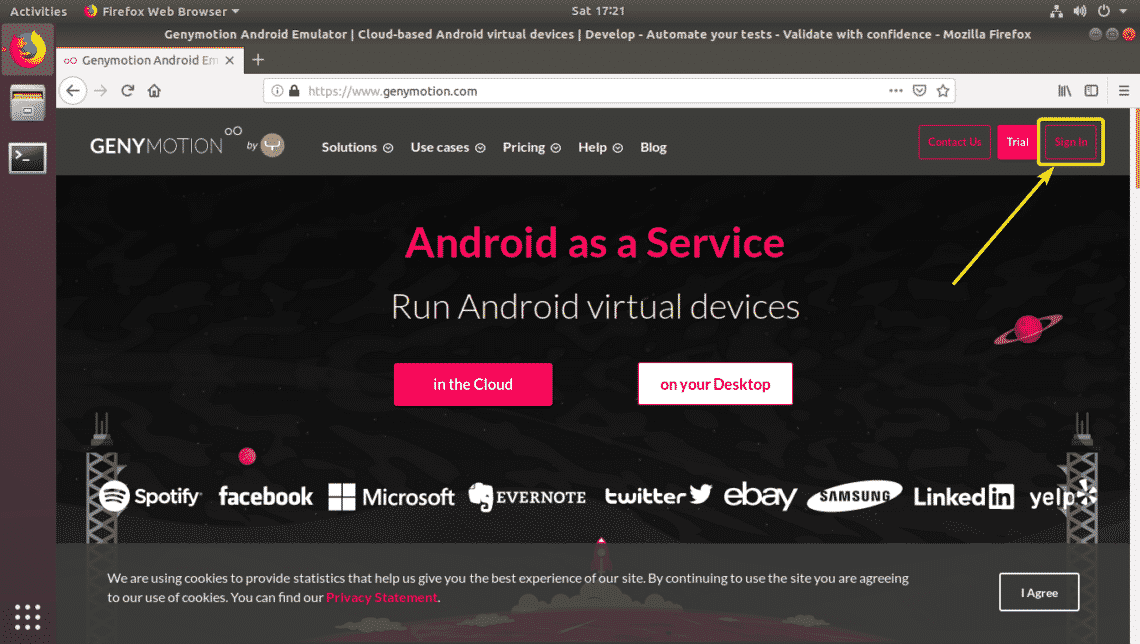
First, go to the official website of Genymotion at https://www.genymotion.com from your favorite web browser and click on Sign In.
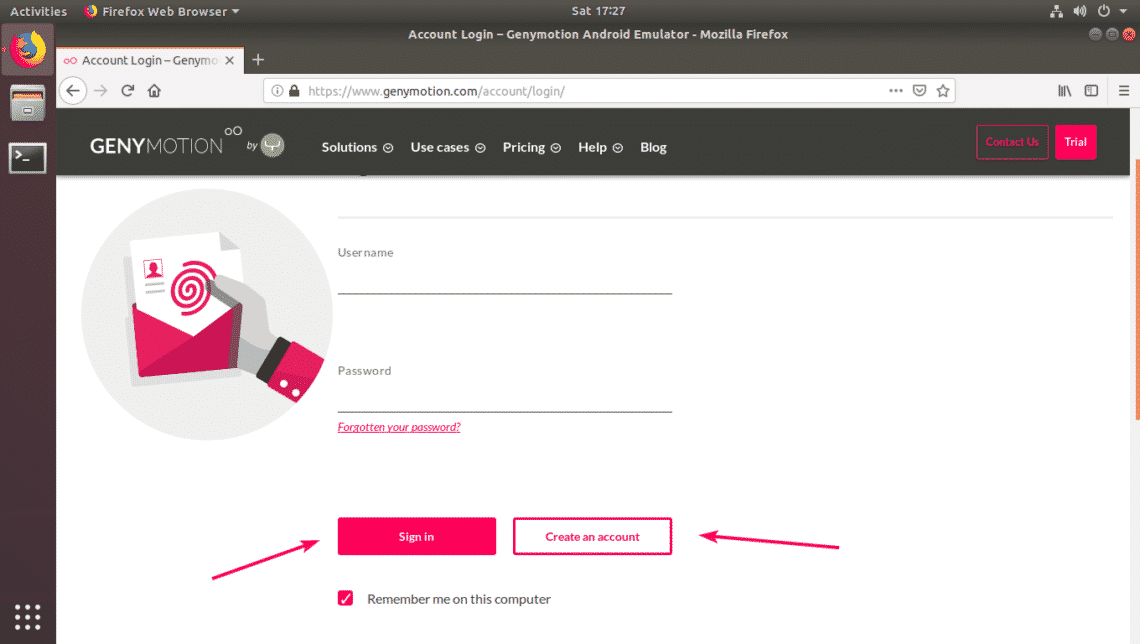
If you have a Genymotion account, just Sign In with your account. If you don’t have one, just click on Create an account, create a new Genymotion account and sign in.
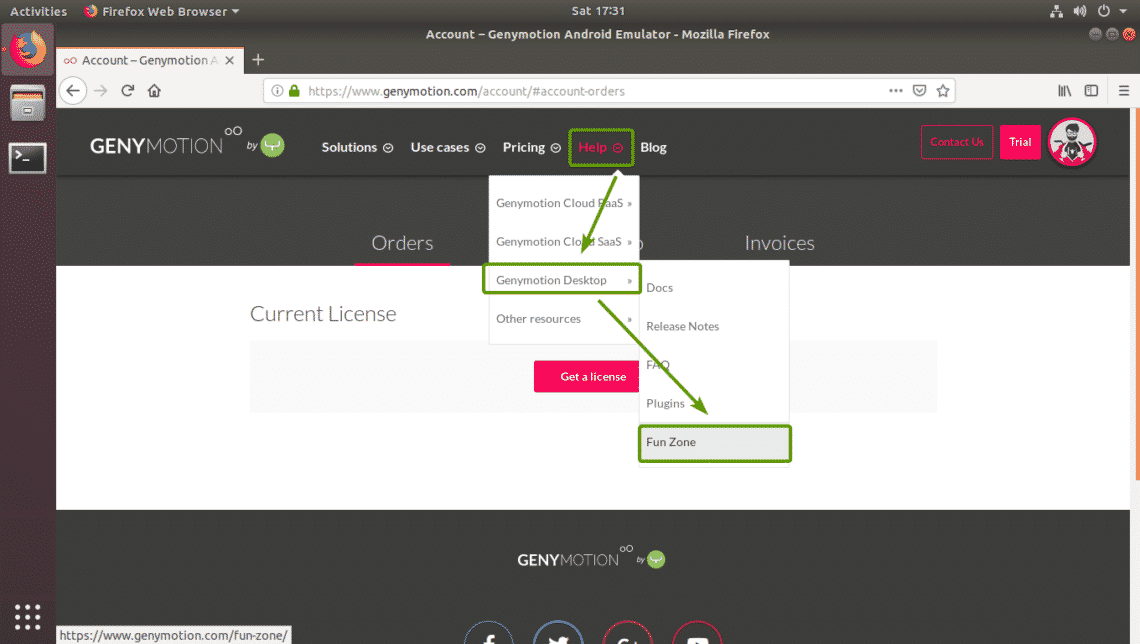
Once you’re logged in, go to Help > Genymotion Desktop > Fun Zone as marked in the screenshot below.
Now, click on Download Genymotion Personal Edition button as marked in the screenshot below.

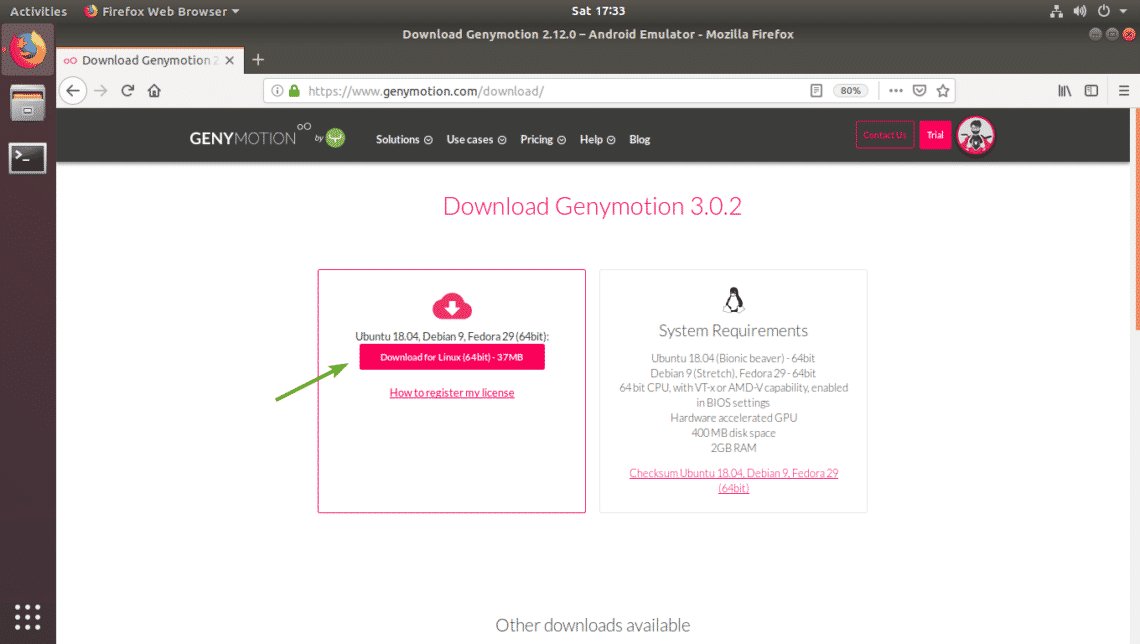
Now, click on Download for Linux (64-bit) button as marked in the screenshot below.
Your browser should prompt you to save the Genymotion installer file. Click on Save File to save it.

Your browser should start downloading Genymotion installer.

Install Genymotion:
Once Genymotion installer is downloaded, you should be able to find it in the ~/Downloads/ directory.
$ ls-l ~/Downloads/

Now, make the installer executable with the following command:
$ chmod +x ~/Downloads/genymotion-3.0.2-linux_x64.bin

Now, run the Genymotion installer with the following command:
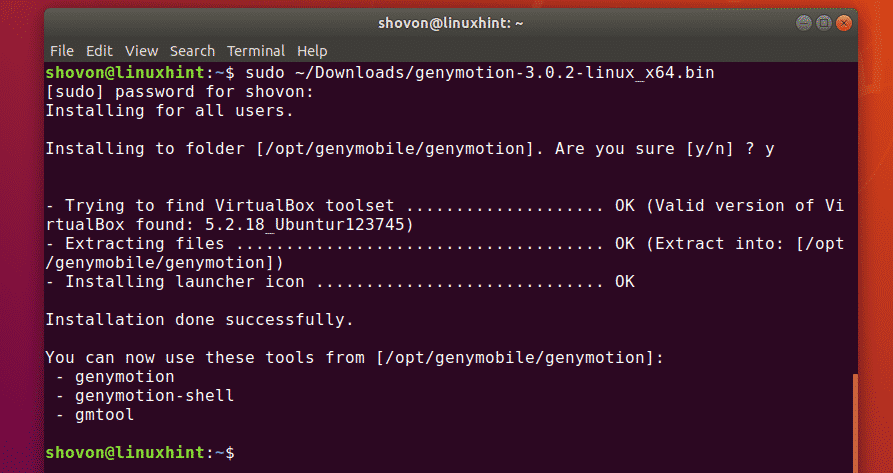
$ sudo ~/Downloads/genymotion-3.0.2-linux_x64.bin

Now, press y and then press <Enter> to continue.

Genymotion should be installed.
Running Genymotion:
Now, you can find Genymotion in the Application Menu of Ubuntu 18.04 LTS.

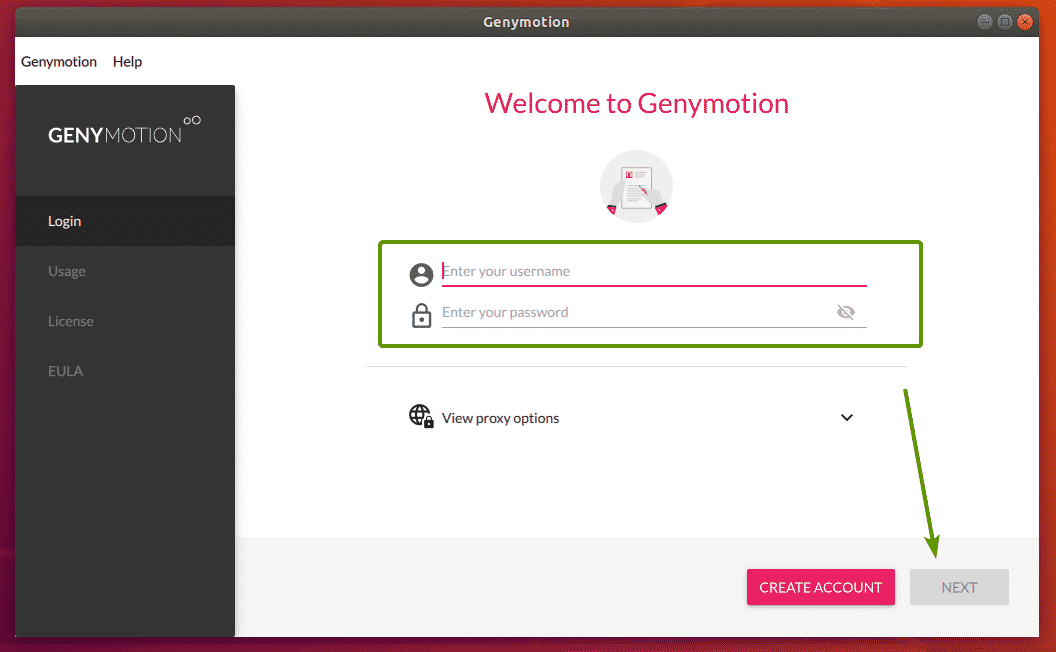
Now, type in your Genymotion login information and click on NEXT.
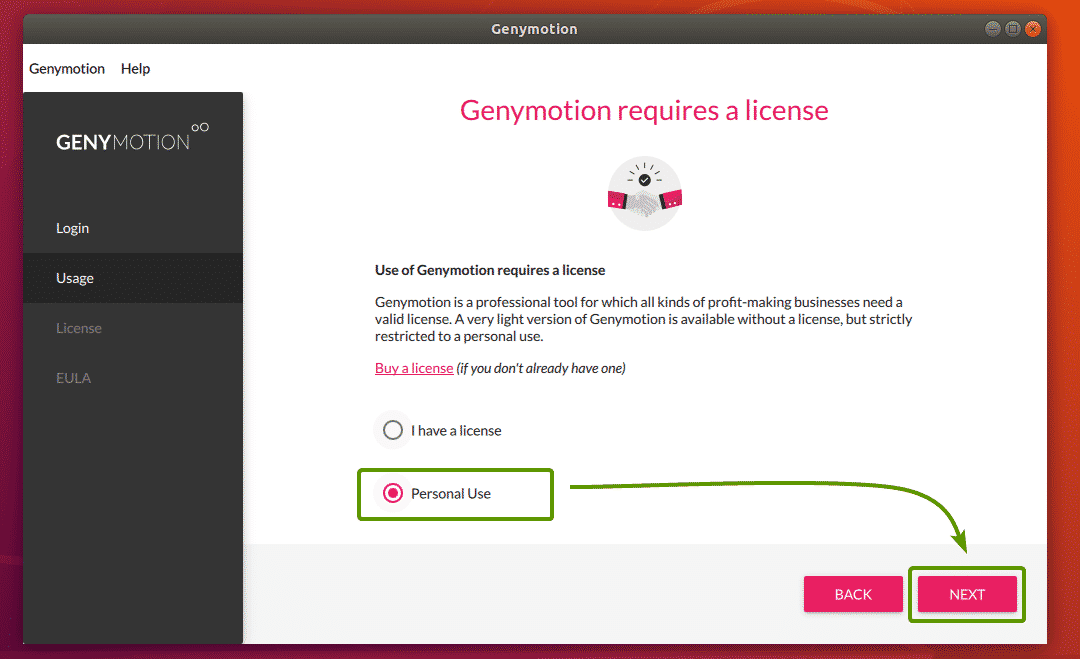
Now, select Personal Use and click on NEXT.
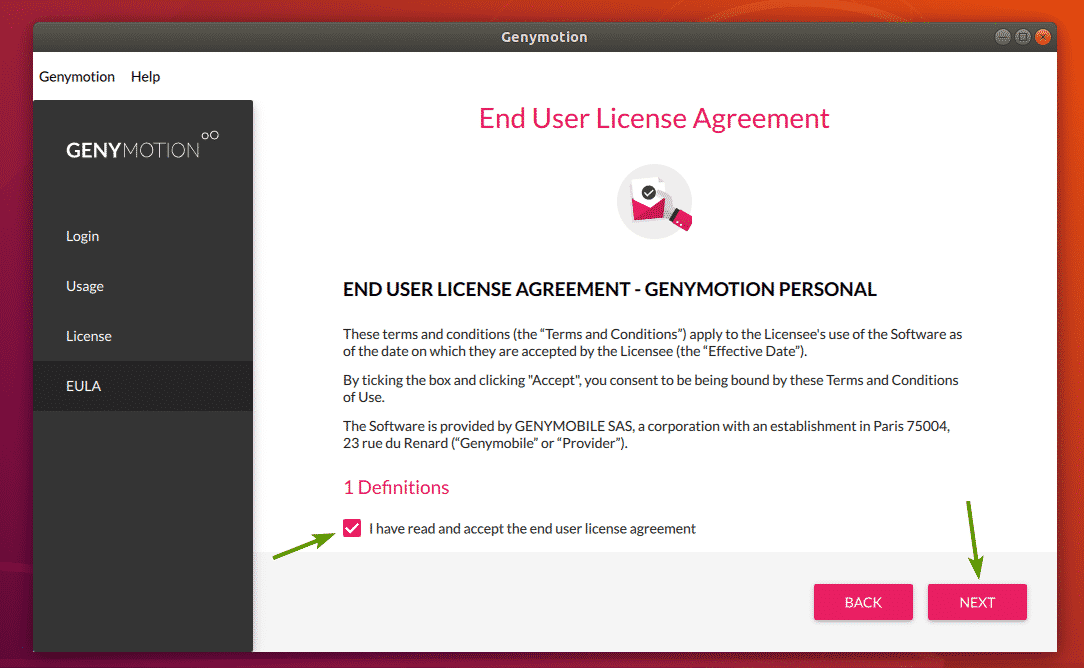
Now, check I have read and accept the end user license agreement and click on NEXT.
Genymotion should start.
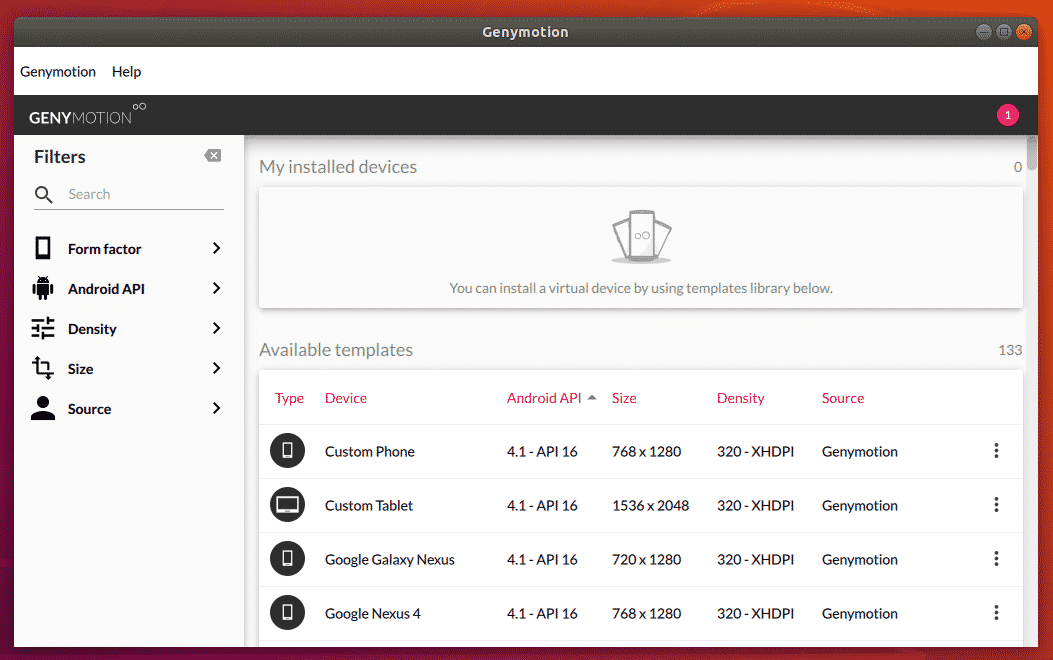
Creating Genymotion Android Virtual Devices:
Genymotion has a lot of available Android virtual device templates to choose from. You can search for templates, filter them by the Form factor (Phone, Small Tablet, Large Tablet), Android API (Android 8, Android 9 etc), Density (screen pixel density) and Size (screen size/resolution).
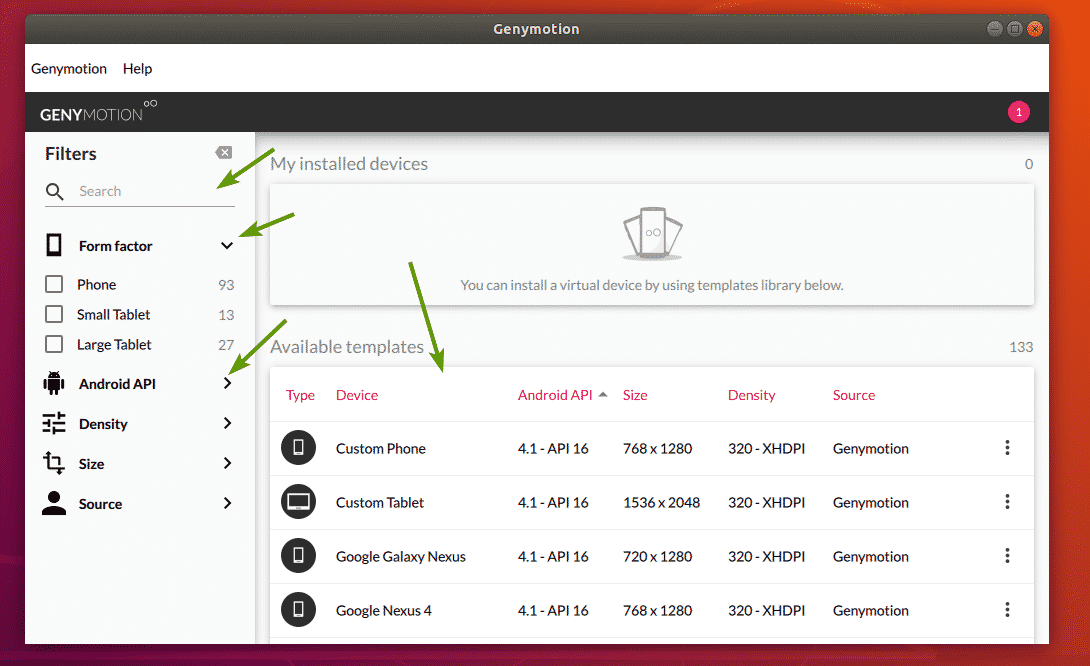
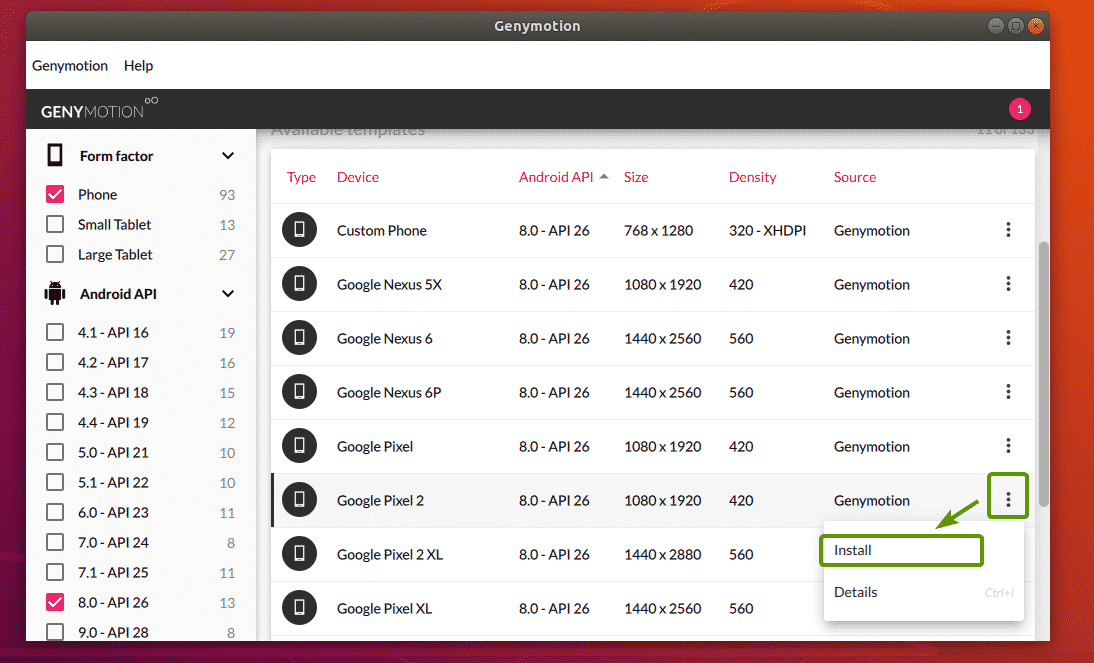
Now, select a device that you like and click on the Menu icon and then click on Install.
Now, you can type in a name to your virtual device, select the display resolution and pixel density from some predefined ones, or set a custom display resolution and pixel density. If you want to start the virtual device in full screen mode, then check Start in full-screen mode checkbox.
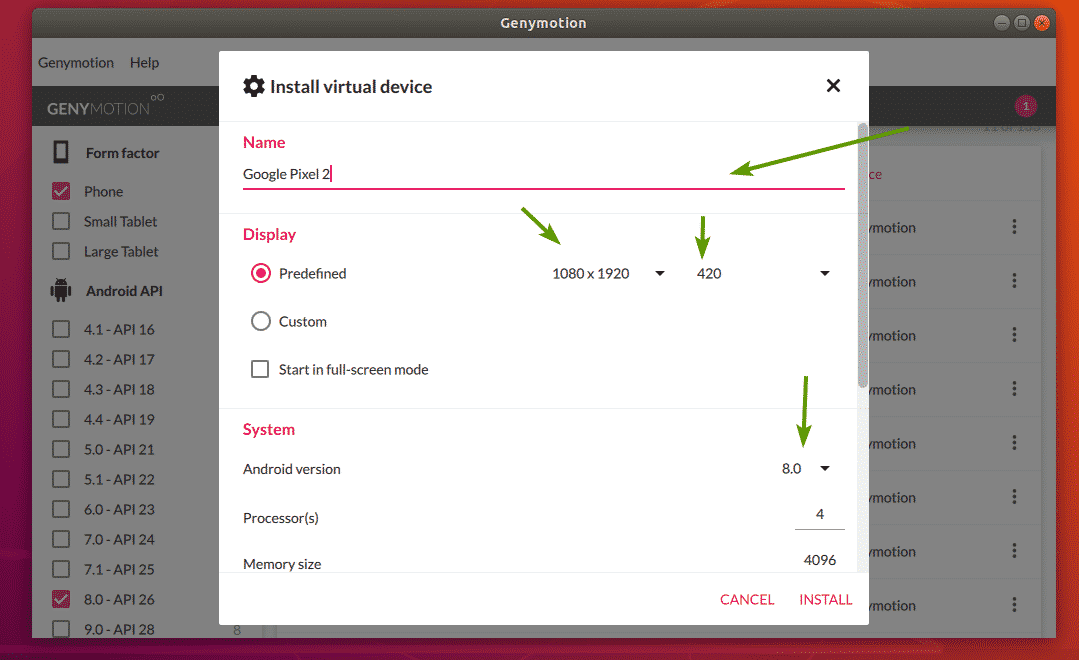
You can also select the Android version you want, select the number of processor core to assign to the virtual device, set the memory size etc. Once you’re done, click on INSTALL.
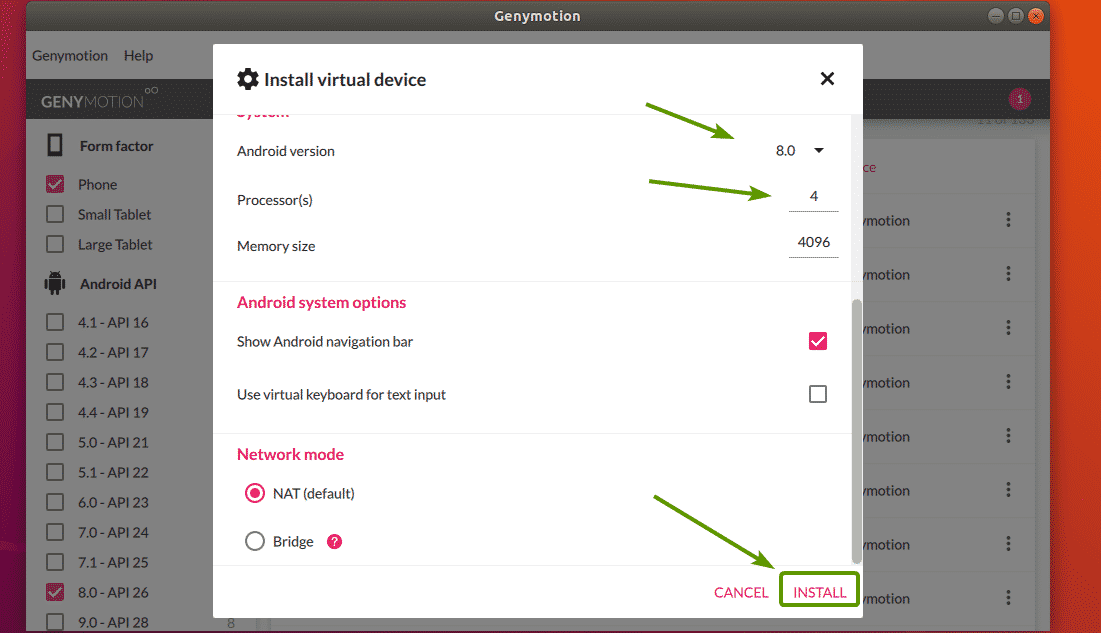
Genymotion should start downloading the required files to create the virtual device.
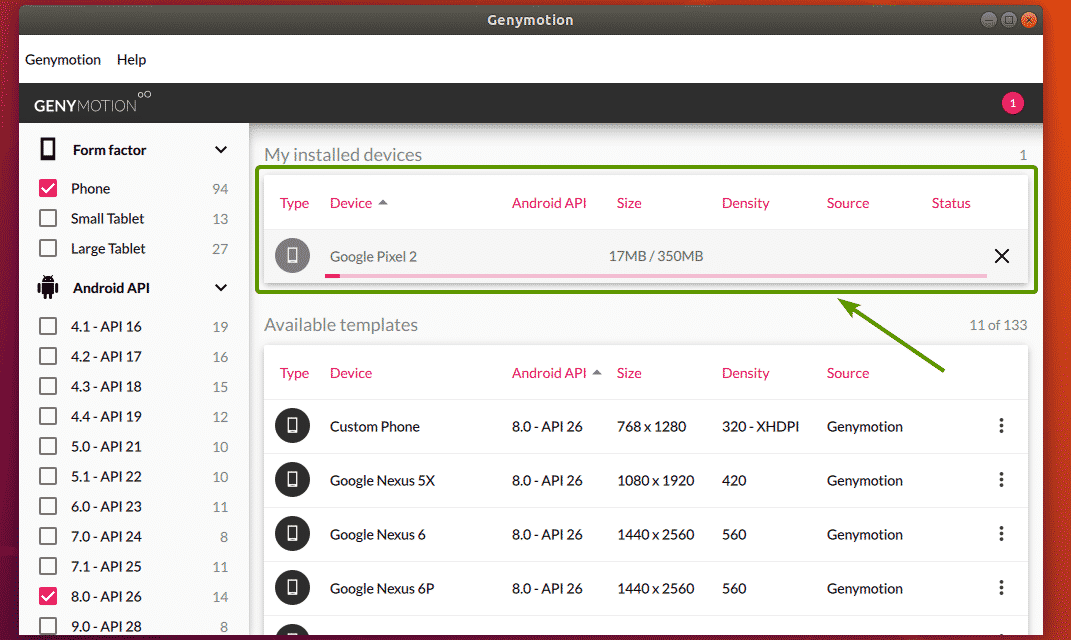
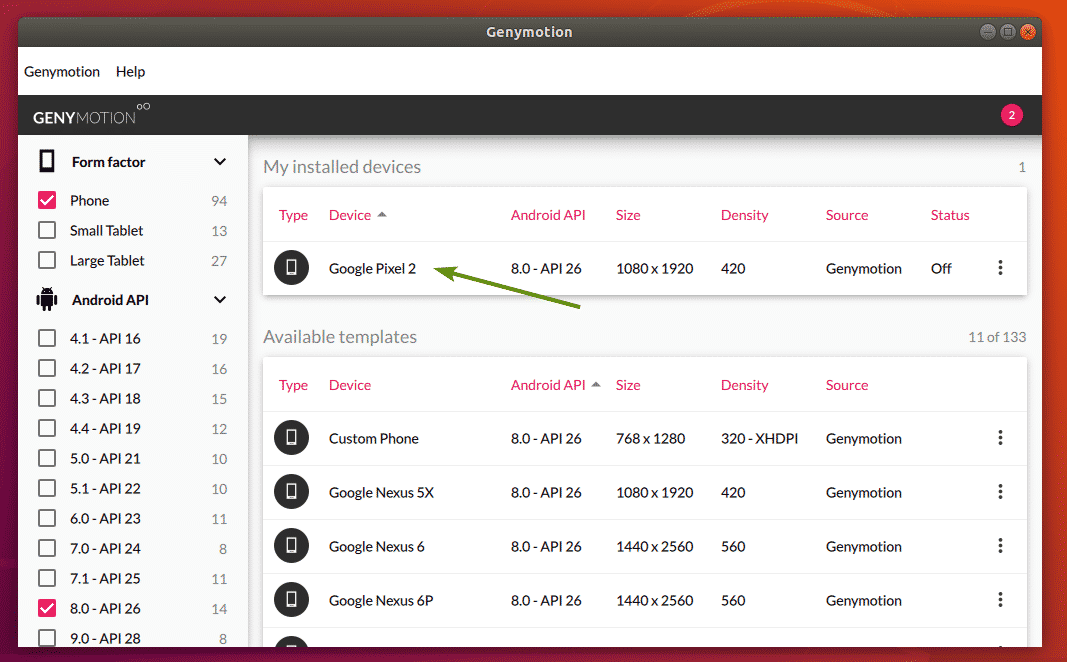
Once the virtual device is ready, it should be listed in My installed devices section.
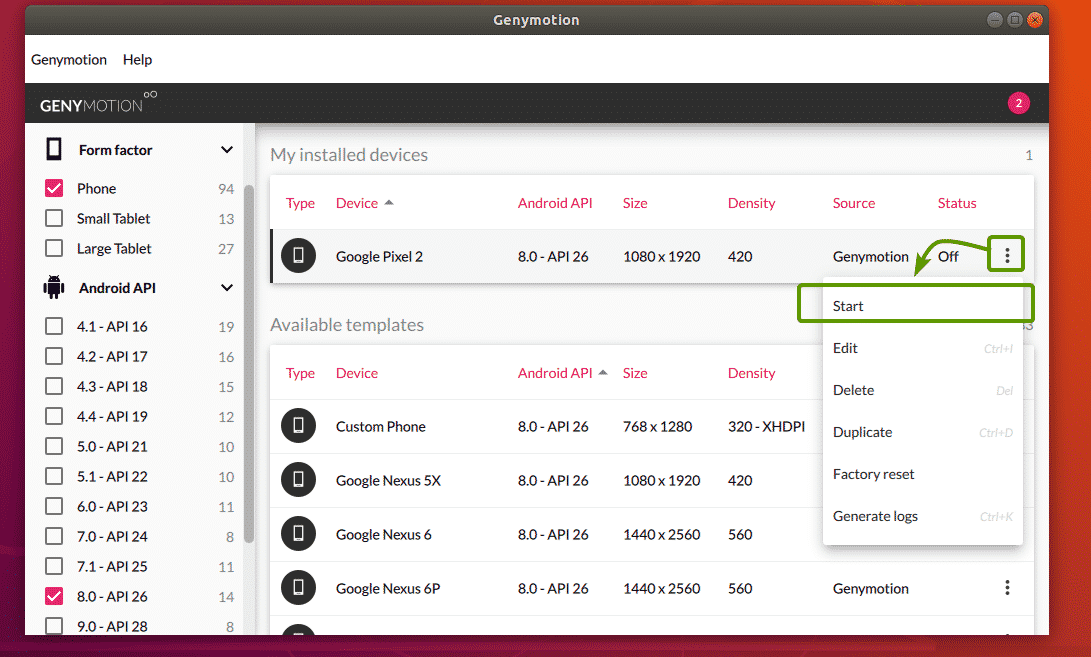
Now, to start the virtual device, click on the Menu icon and click on Start.
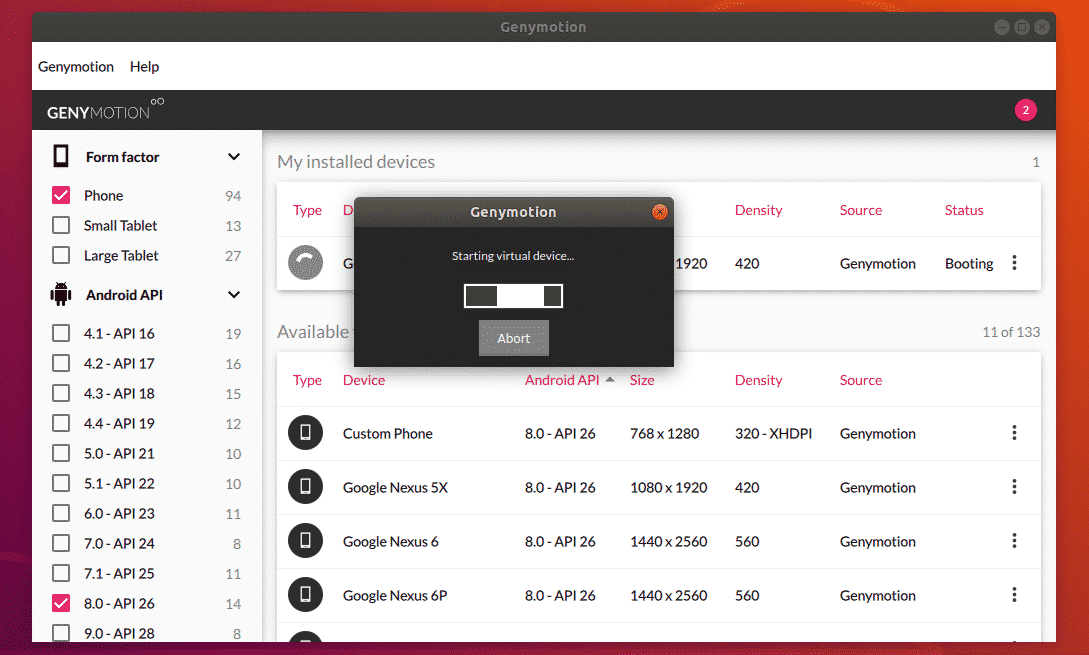
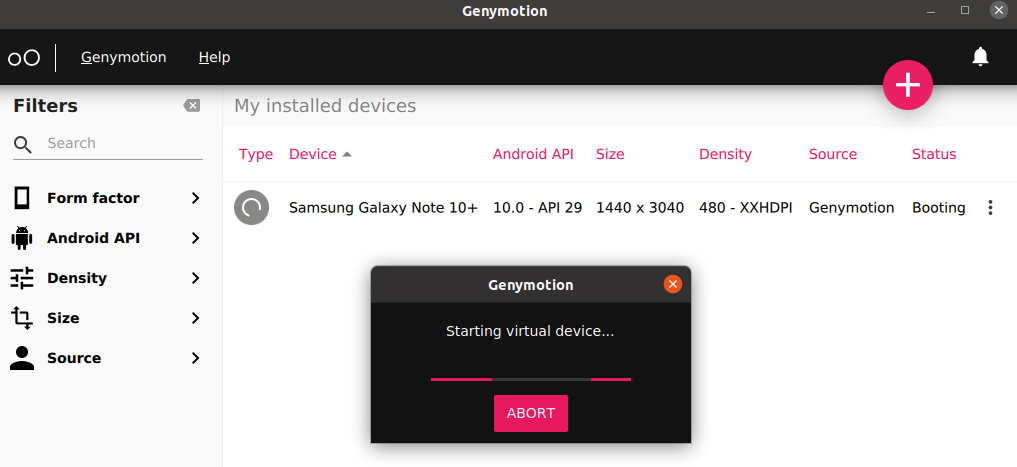
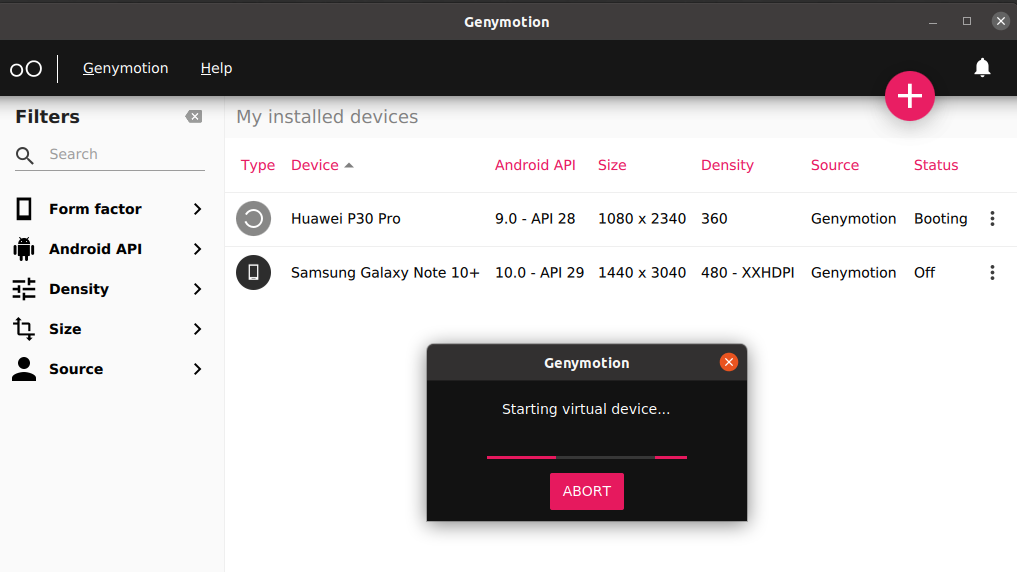
As you can see, Genymotion is starting the virtual device.
After a while, an Android virtual device should be started. Now, you can install android apps on it, run your favorite games and many more on this virtual device.4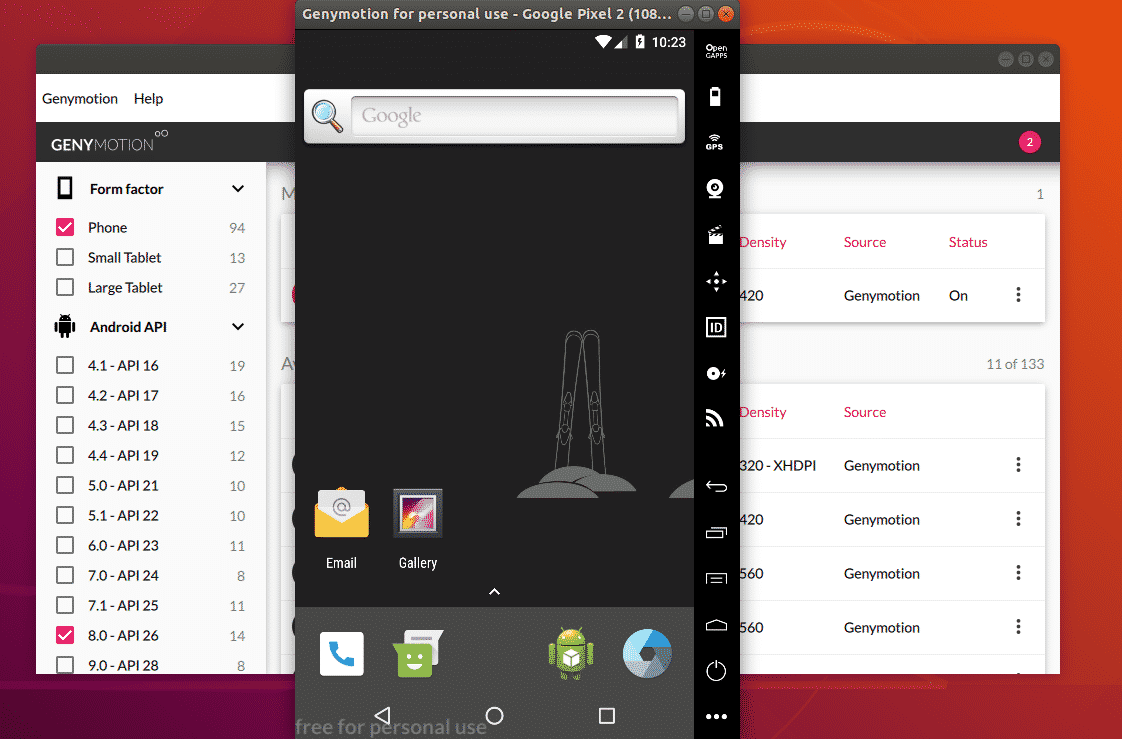
You can create as many Android virtual devices as you want using Genymotion.
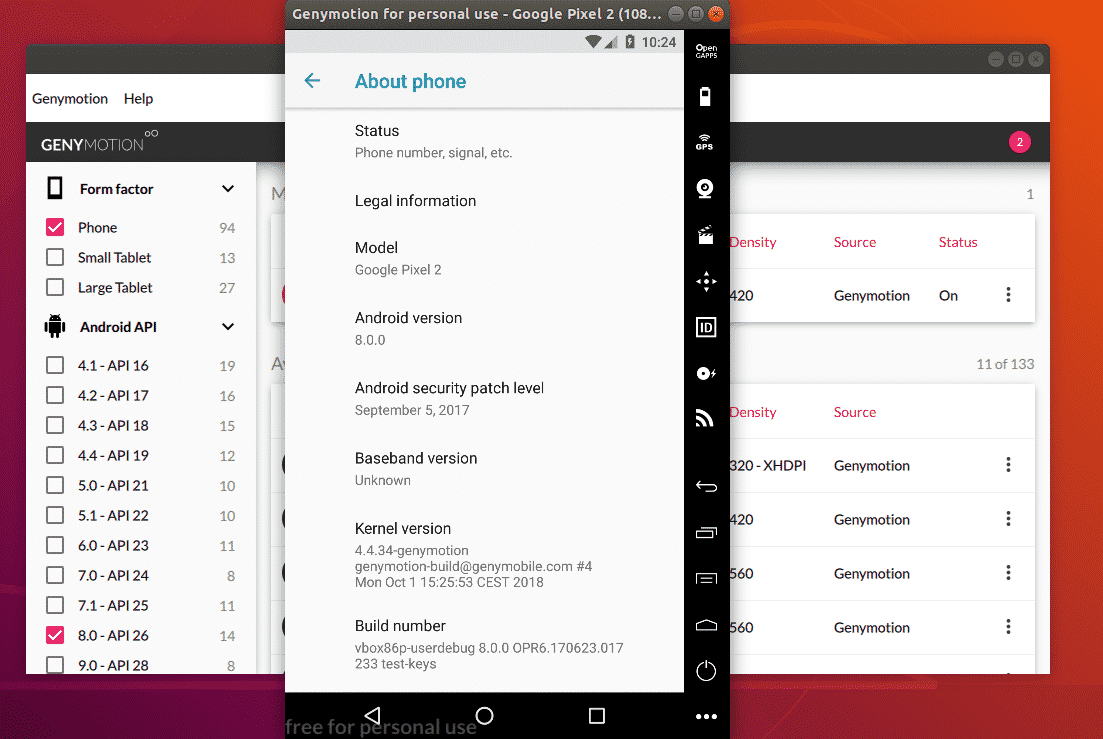
So, that’s how you install Genymotion Android emulator on Ubuntu 18.04 LTS. Thanks for reading this article.
1.Run package updates and repositories
sudo apt update
2. Install Virtualbox
sudo apt install virtualbox
Sample Output:
tux@FreeLinux:~$ sudo apt install virtualbox
Reading package lists… Done
Building dependency tree
Reading state information… Done
DKMS: install completed.
Preparing to unpack …/9-virtualbox-qt_6.1.22-dfsg-2~ubuntu1.20.04.1_amd64.deb
Unpacking virtualbox-qt (6.1.22-dfsg-2~ubuntu1.20.04.1) …
Setting up virtualbox (6.1.22-dfsg-2~ubuntu1.20.04.1) …
Setting up virtualbox-qt (6.1.22-dfsg-2~ubuntu1.20.04.1) …
3. Download the linux installer on Genymotion website https://www.genymotion.com/download/
Note: You can do via wget also (current version at the time of this writing is 3.2.1)
wget https://dl.genymotion.com/releases/genymotion-3.2.1/genymotion-3.2.1-linux_x64.bin
4. Install Genymotion
a. Make the binary installer executable
chmod +x genymotion-3.2.1-linux_x64.bin
b. Run the installer
./genymotion-3.2.1-linux_x64.bin
Sample Output:
tux@FreeLinux:~/Downloads$ ./genymotion-3.2.1-linux_x64.bin
Installing for current user only. To install for all users, restart this installer as root.
Installing to folder [/home/tux/Downloads/genymotion]. Are you sure [y/n] ? y
– Trying to find VirtualBox toolset ……………….. OK (Valid version of VirtualBox found: 6.1.22_Ubuntur144080)
– Extracting files ………………………………. OK (Extract into: [/home/tux/Downloads/genymotion])
– Installing launcher icon ……………………….. OK
Installation done successfully.
You can now use these tools from [/home/tux/Downloads/genymotion]:
– genymotion
– genymotion-shell
– gmtool
c. Find it under the Applications Menu and click it. You can add it on favorites if you want.

d. Create account
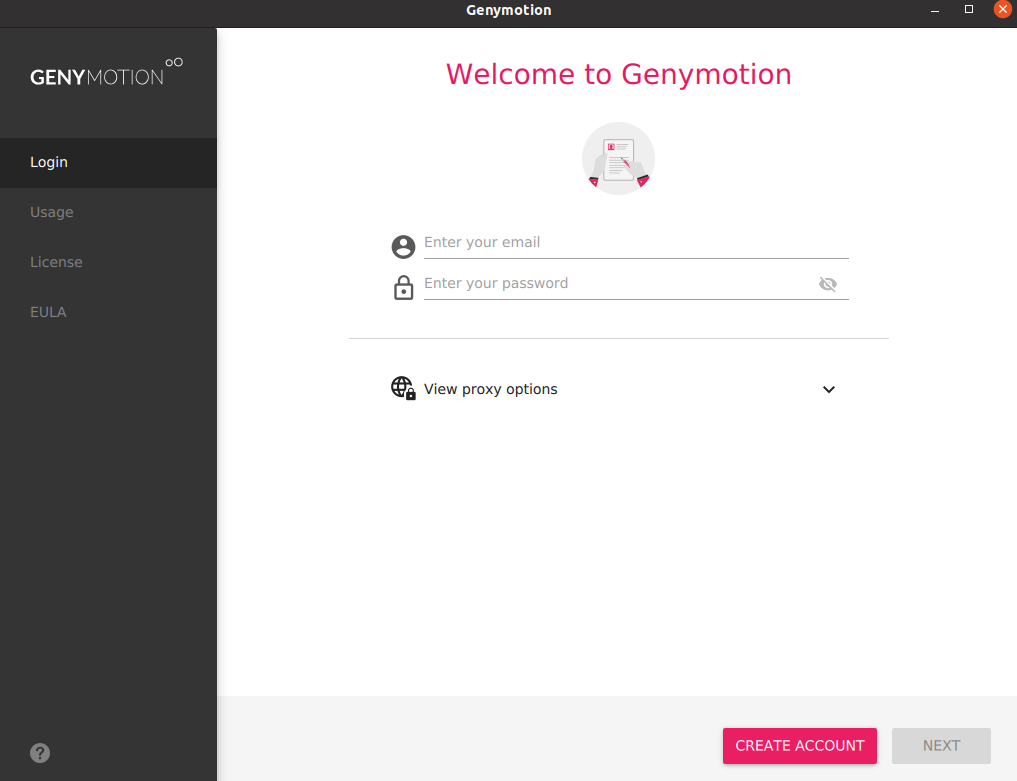
e. Register if still no account

f. Login and select “Personal Use” if you didn’t buy the license
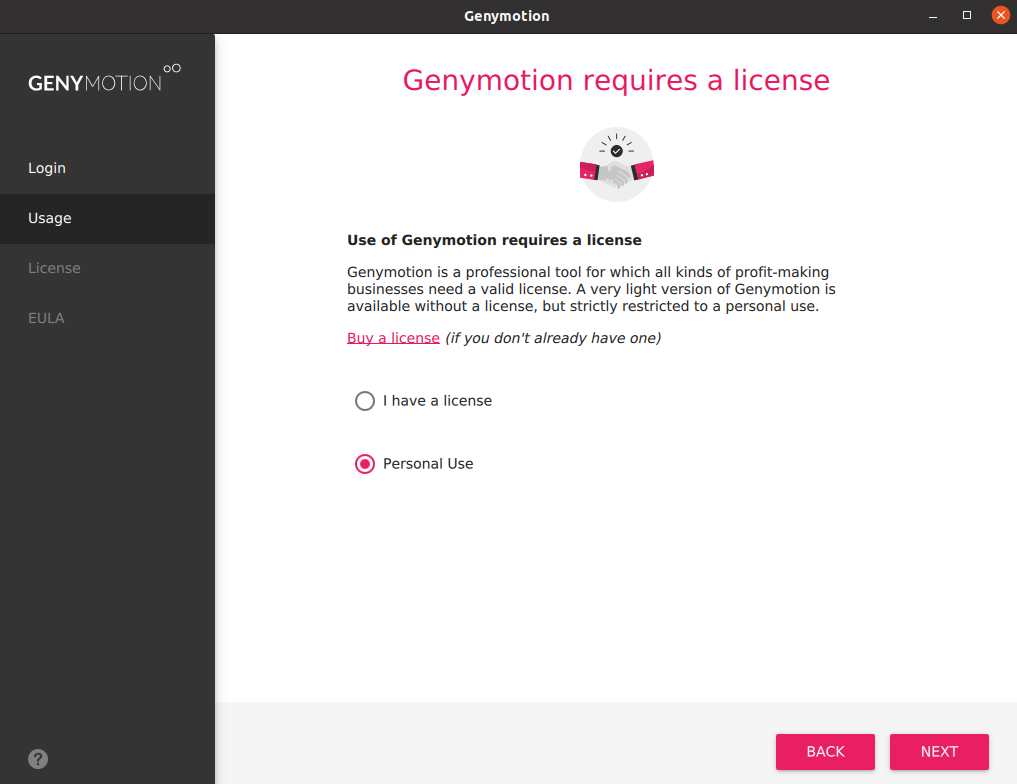
g. Agree on the End User License and Click Next

h. Add Device by clicking the “+” sign

i. Choose for the virtual device and click Next.
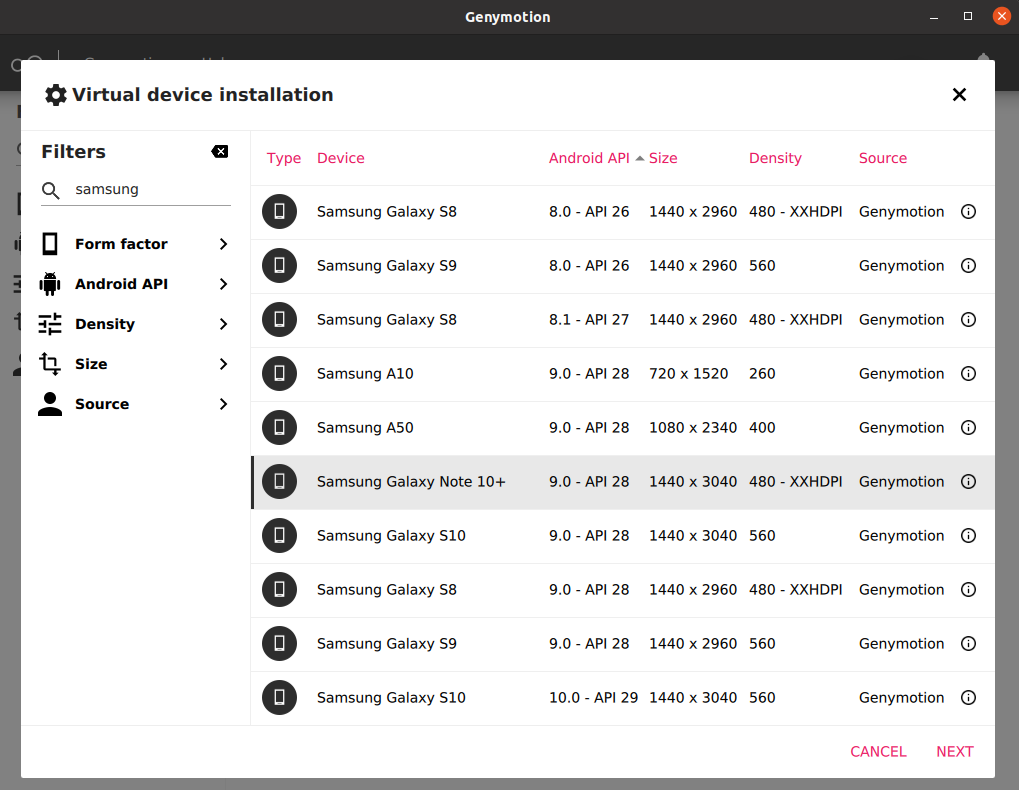
j. Input Name, Android version,display and memory size. Click Install.

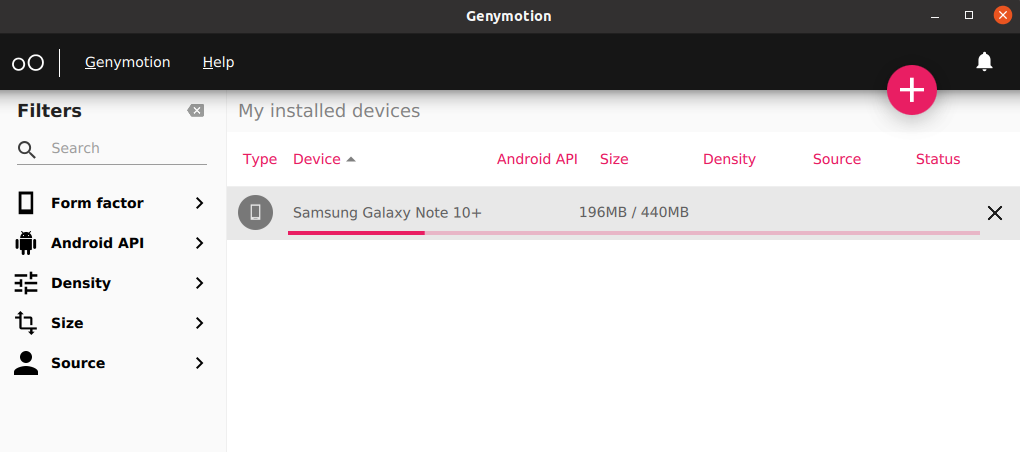

k. Select the virtual device and double click to run (or right click, Start)

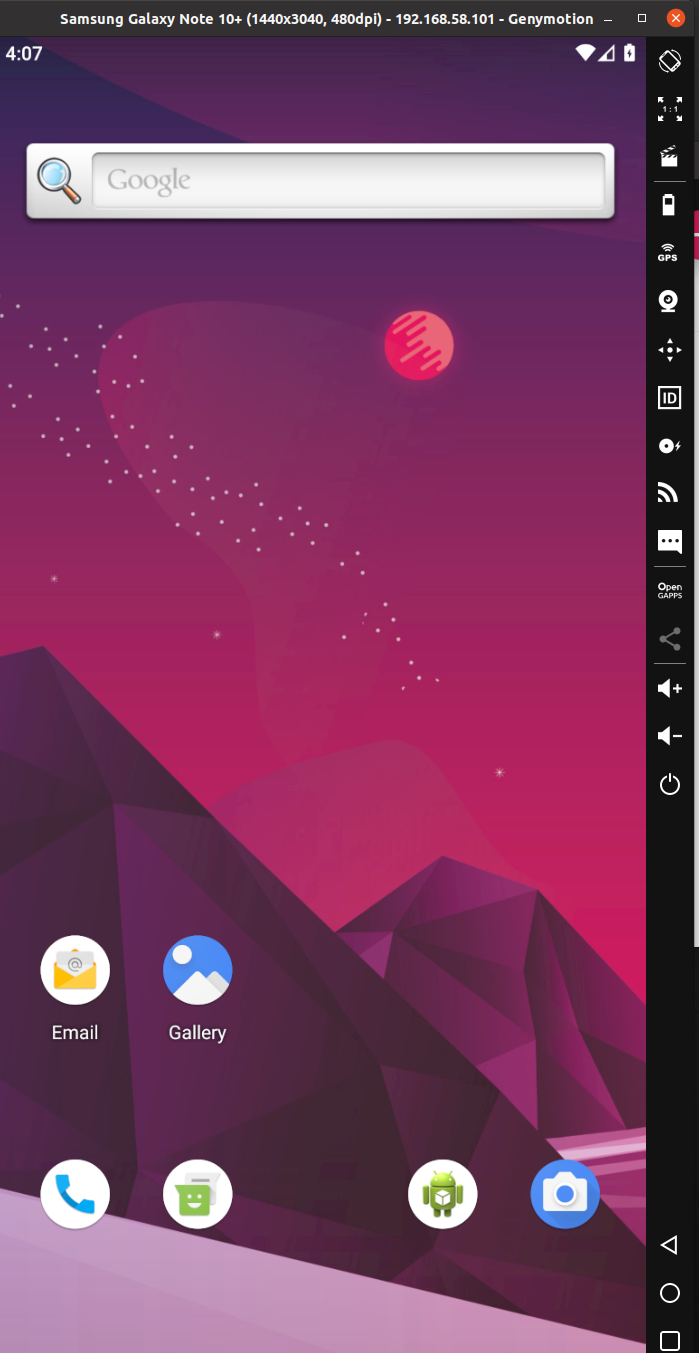
l. To install the Google Play Store, click Click “Open Gapps” (located at the right middle menu). Install and Restart.


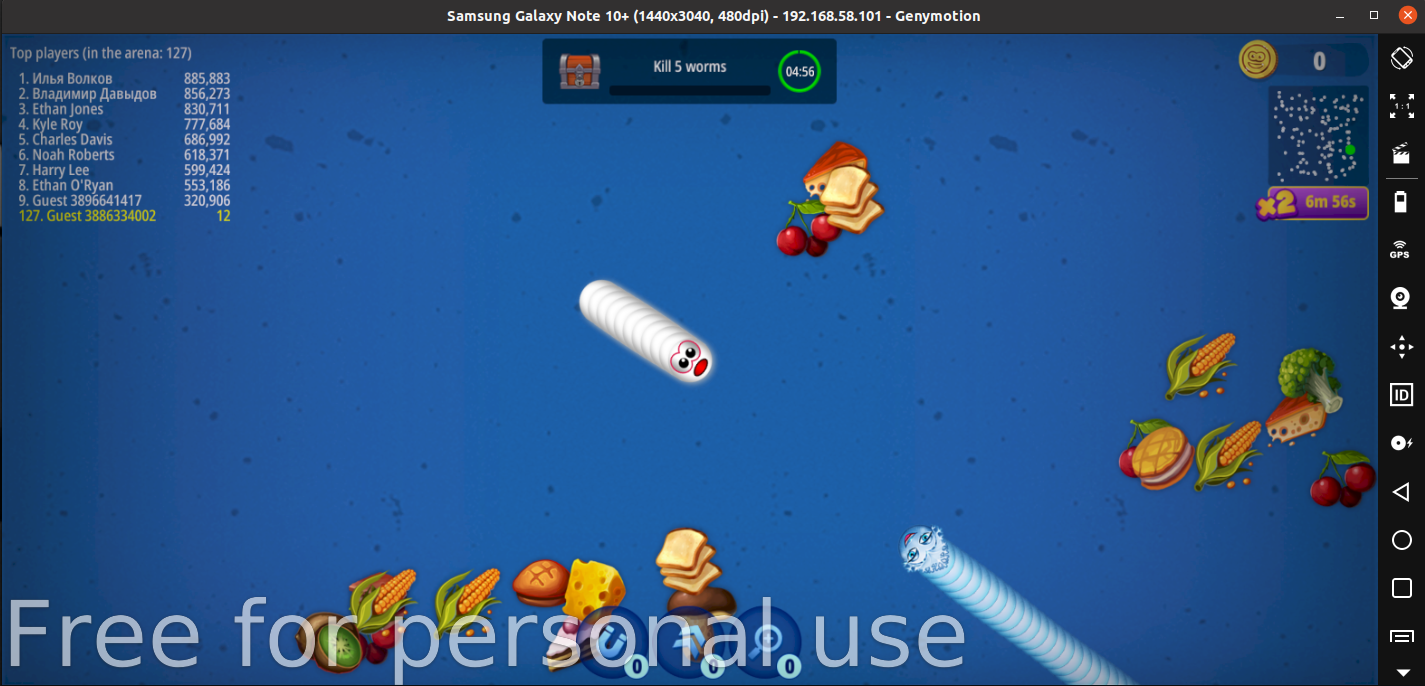
m. Swipe up and you will see now the Play store apps.

n. Find games or apps and install as per normal


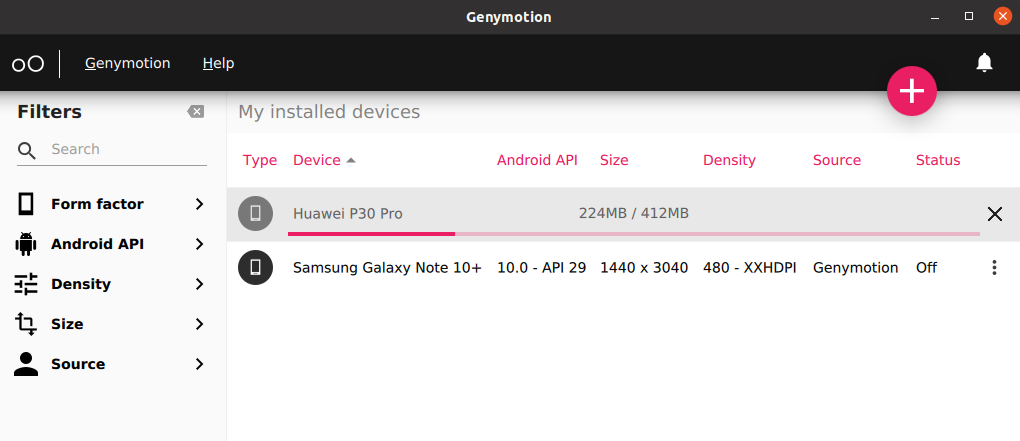
p. (Optional) Install additional virtual devices


Related
How to Install Genymotion Emulator and Add it’s Plugin to Android Studio?
Genymotion is an Android Emulator that is faster than the Android Studio Emulator. Genymotion emulator offers a wide range of virtual devices for development, test, and demonstration purpose. It has a very simple user interface and one can directly use it from Android Studio by installing its plugin only once. The Genymotion plugin for Android Studio allows testing the application developed with the Android Studio IDE. It uses ADB to connect to any active virtual device and push the application. So in this article let’s discuss how to install the Genymotion Emulator and also installing its plugin in the Android Studio to run the program.
Step by Step Implementation
Step 1: First we have to install Genymotion in our own system. So to download Genymotion please go to this site. Then click on the “Download Genymotion Personal Edition” button.
Note: Please sign in yourself to Genymotion if you have already not an account on Genymotion.
Step 2: In the next step click on the button as your requirement. If you have already installed VirtualBox on your system then go for the 2nd button and if not then go for the 1st button as shown in the below image. If you are using macOS or Linux then scroll below on that page and get your file.
Step 3: Once the download is completed install the Genymotion in your system and open Genymotion. After opening Genymotion sign in yourself with your ID and password.
Note: If a pop-up will arise on the screen then click on the Personal Use button.
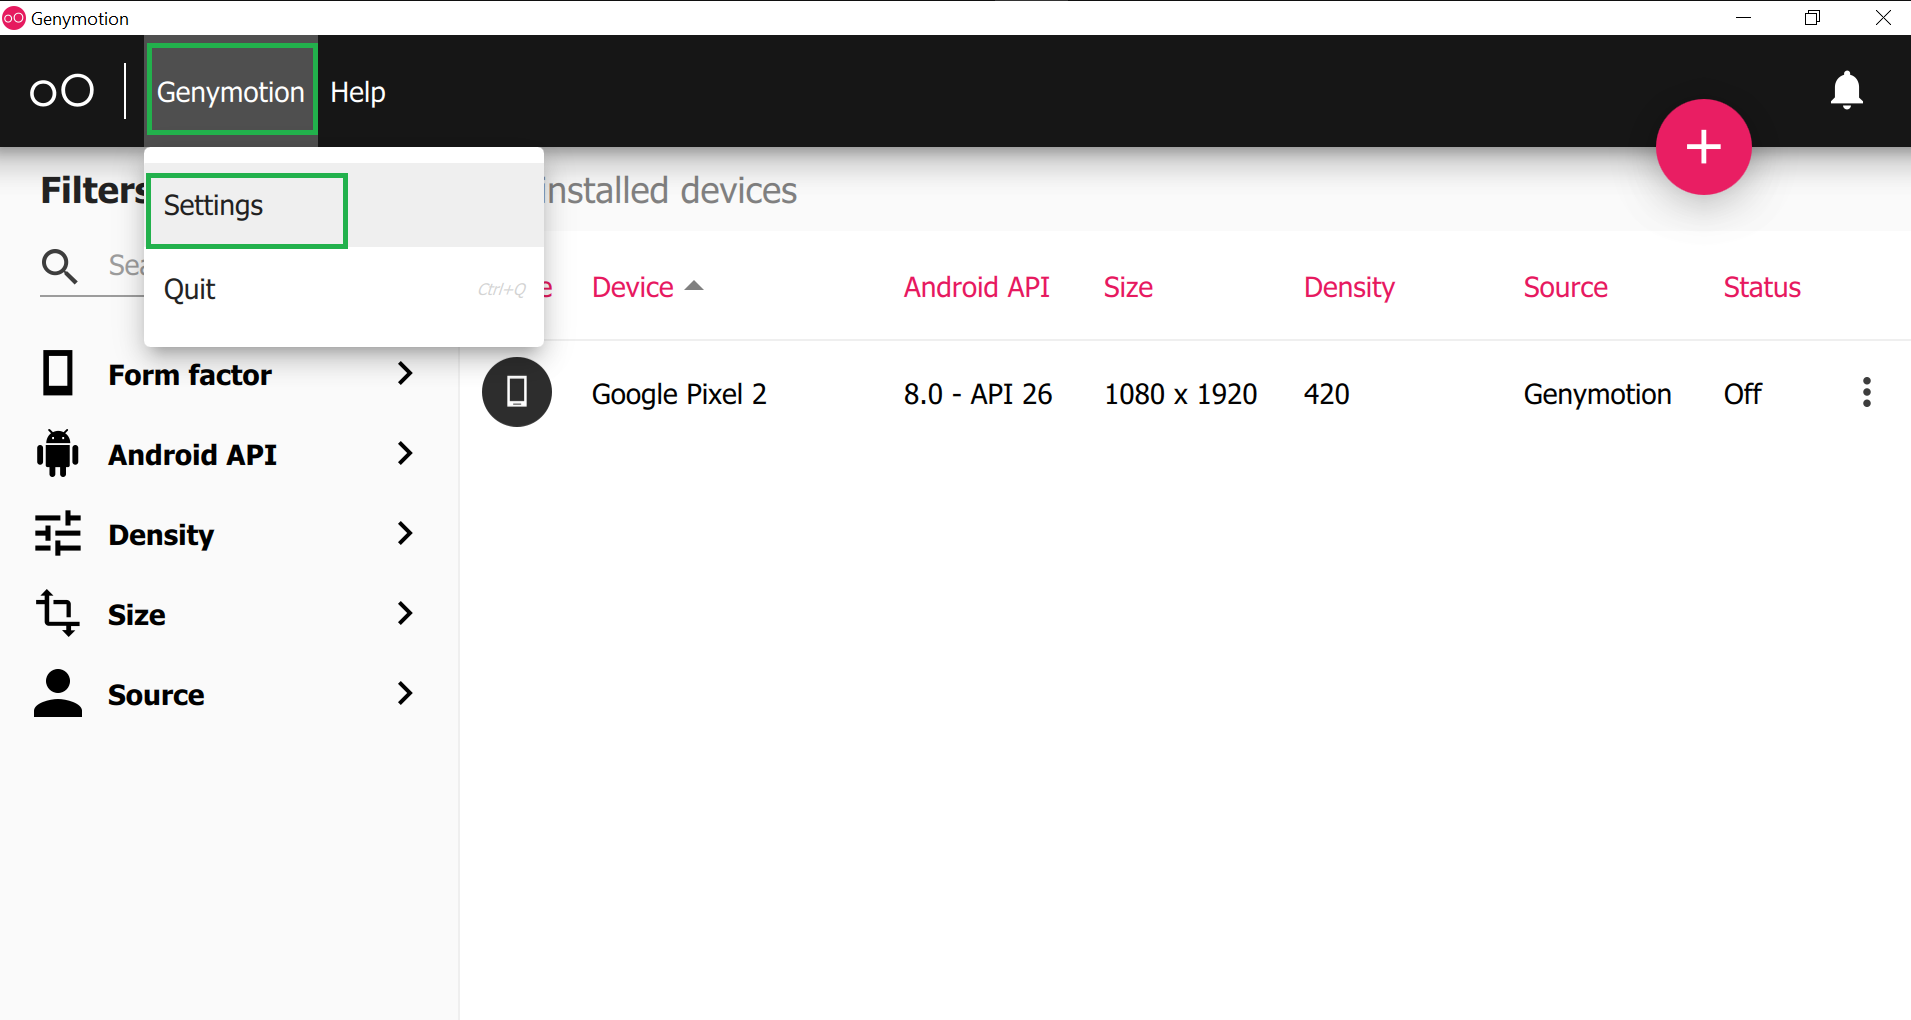
Step 4: Now click on the Genymotion and go to the Settings as shown in the below image.
Step 5: Then go to ADB and choose “Use custom Android SDK tools” and select your Android SDK path as shown in the below image. And there is nothing to do with other widgets. Now close this screen.

How to know the Android SDK path in your system?
To know the Android SDK path open your Android Studio and click on the Tools > SDK Manager as shown in the below image.

Then a screen will arise as in the below image and you can locate your Android SDK path.
Step 6: Now click on the ‘pink +‘ screen as shown in the below image.

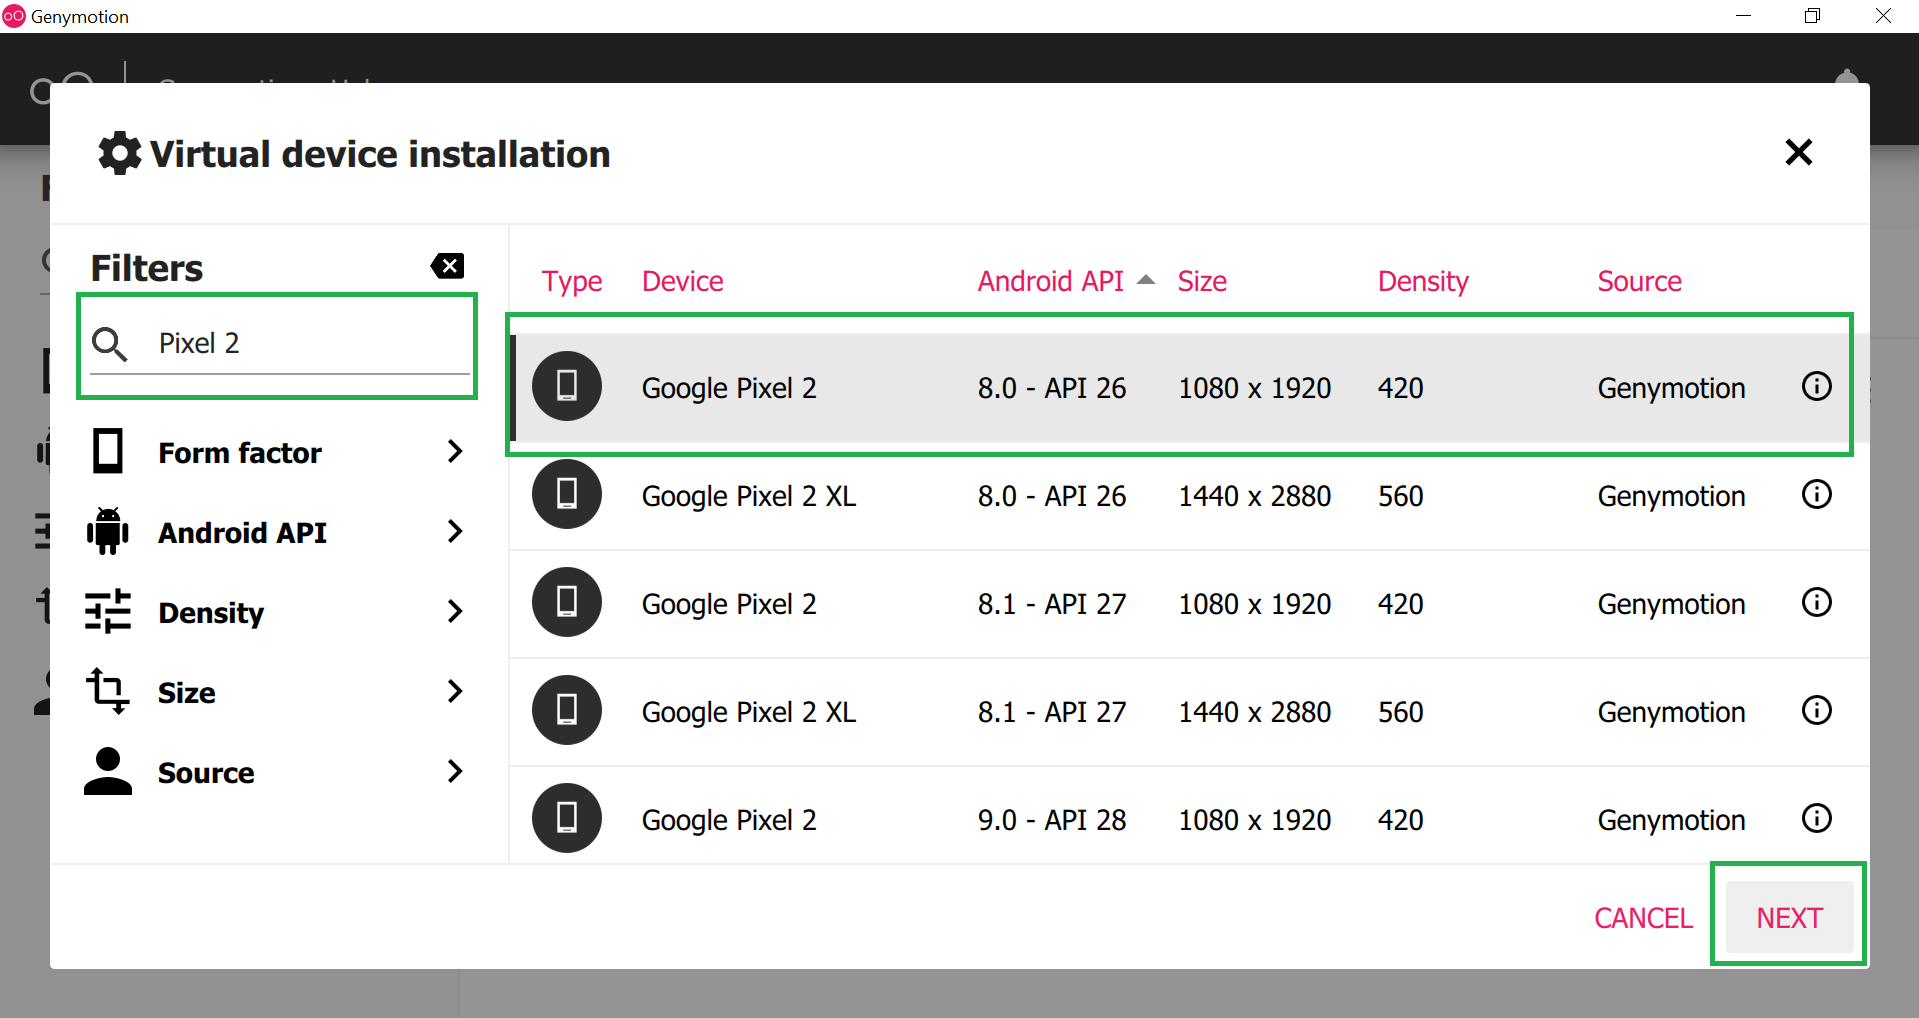
Step 7: Now search your favorite virtual device name and click on the device name and at last click on the NEXT button as shown in the below image.
Step 8: Choose an appropriate name for your emulator and then click on the INSTALL button. This will take a few times to download the required files.

Step 9: After successfully downloaded the required files you can find your emulator on the main screen. Now click on the Start button as shown below image and your Genymotion emulator is ready for use.

This is how Genymotion Emulator looks like.

How to add Genymotion Plugin to Android Studio?
In computing, a plug-in is a software component that adds a specific feature to an existing computer program. When a program supports plug-ins, it enables customization.
Similarly, we have to add the Genymotion plug-in to Android studio to use the Genymotion Emulator for developing and testing the project. To do so follow the following steps:
Step 1: Open the Android Studio and go to File > Settings and a pop-up will arise as seen in the below image. This will automatically select the Plugins section. Then search the Genymotion plugins and click on the Install button. This will download some files and it will ask to restart the Android studio and so click on the Restart Android Studio button.
Note: We have already installed the Genymotion plugin so it’s showing installed.

Step 2: After successfully restart the Android Studio again go to File > Settings > Other Settings > Genymotion as shown in the below image.

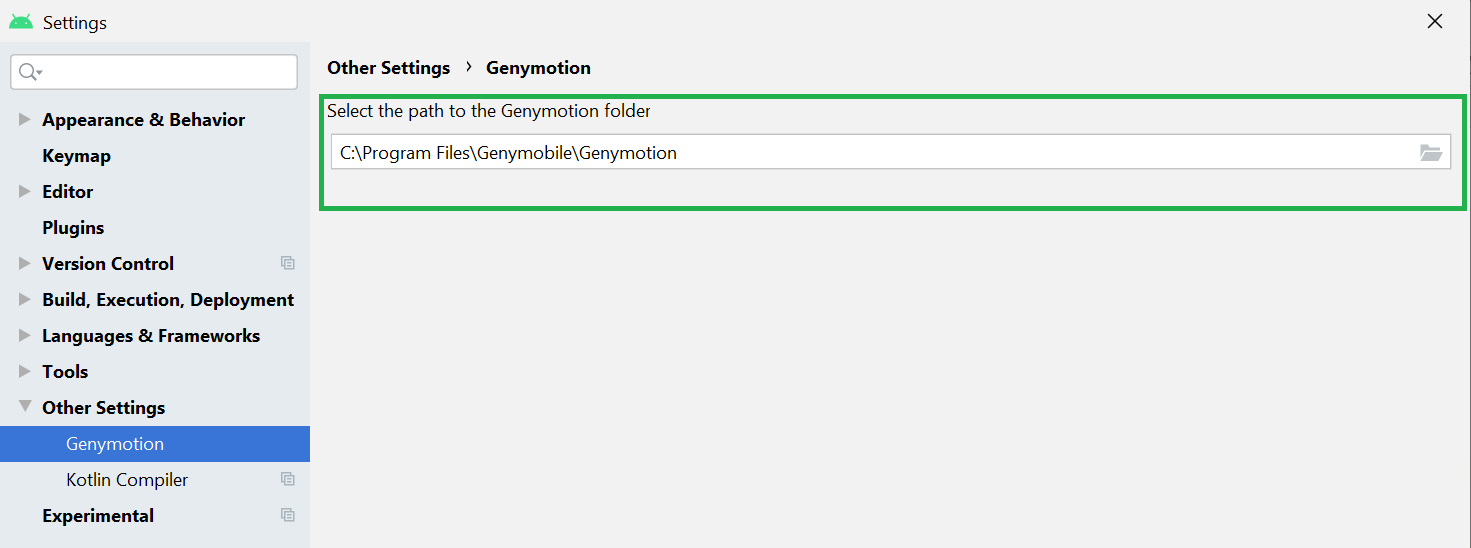
Step 3: Then select the path to the Genymotion folder. In most cases, you can find the path at C:\Program Files\Genymobile\Genymotion.Then just click on OK and you are done.
Make sure your Genymotion Emulator is started and you can see the Genymotin Emulator is active you can execute your program on that emulator as shown in the below image.

How to install Genymotion 2.12.1 on Ubuntu 18.04
To install Genymotion 2.12.1 on Ubuntu 18.04
Genymotion is one of most popular Android Emulator to Run/Debug your android application, and it' s free to use. Most of the Android developer use Genymotion at the time of application development. If you don’ t want to test your application on your device then this tool is perfect for you.
Features
&bull Camera: Use your laptop webcam as the video source for your Android camera.
&bull Plugins / Testing tools: Genymotion is compatible with Android SDK tools, Eclipse and Android Studio.
&bull Battery: Test your app with various charge levels and see how it handles those use cases.
&bull Browser: Test your website in various Android browsers: Webkit for Android, Firefox for Android and many more!
&bull GPS: Use the GPS widget to easily develop and test your geolocation-based apps.
&bull Perfectly adapted: Genymotion works on Linux, Windows, Mac OS X.
Installation
Install Virtual Box using this following command
[email protected]:~# apt-get install virtualbox -y Reading package lists... Done Building dependency tree Reading state information... Done The following packages were automatically installed and are no longer required: apache2-bin apache2-data apache2-utils libapr1 libaprutil1 libaprutil1-dbd-sqlite3 libaprutil1-ldap Use ' sudo apt autoremove' to remove them. The following additional packages will be installed: . . depmod....... DKMS: install completed. Setting up virtualbox (5.2.10-dfsg-6) ... vboxweb.service is a disabled or a static unit, not starting it. Setting up virtualbox-qt (5.2.10-dfsg-6) ... Processing triggers for libc-bin (2.27-3ubuntu1) ... Processing triggers for systemd (237-3ubuntu10) ... Processing triggers for ureadahead (0.100.0-20) ...Download the Genymotion Linux package using this following URL
https://www.genymotion.com/download/
switch the Downloaded directory
[email protected]:~# cd /home/user1/Downloads/After downloading a file, give a executable file permission for the file as follows
[email protected]:/home/user1/Downloads# chmod +x genymotion-2.12.1-linux_x64.binInstall a Genymotion application
[email protected]:/home/user1/Downloads# ./genymotion-2.12.1-linux_x64.bin Installing for all users. Installing to folder [/opt/genymobile/genymotion]. Are you sure [y/n] ? y - Trying to find VirtualBox toolset .................... OK (Valid version of VirtualBox found: 5.2.10_Ubuntur121806) - Extracting files ..................................... OK (Extract into: [/opt/genymobile/genymotion]) - Installing launcher icon ............................. OK Installation done successfully. You can now use these tools from [/opt/genymobile/genymotion]: - genymotion - genymotion-shell - gmtoolAfter the installation, you can access the application from the menu as follows
choose the license to use the Genymotion

sign in to the Genymotion application
Choose the Virtual device and Configure
Choose the name of the Virtual device
The Virtual device is being downloading
Deploy the Virtual device by clicking " Finish" 
Genymotion application.
With this, the method to install Genymotion 2.12.1 on Ubuntu 18.04 comes to an end.
Genymotion is an easy to use, lightweight, and robust multi-platform Android emulator. This emulator is not one of the generic emulators; it is used to run and test apps efficiently and effectively. It uses the OpenGL functionalities, which make it a fairly fast emulator. Genymotion emulator is quite advantageous to developers, gamers, and even application testers. The top features of Genymotion are:
- All versions of the Android can be emulated
- Multi-platform emulator
- Allows testing on different screen sizes
- Monitors the battery level while testing apps
- Location-based applications can also be tested since it comes with GPS widget
- Emulate webcam as an android camera
- Tests 4G, 3G, and wifi services
- Multi-touch and accelerometer events can be emulated if your Android device is connected to the computer
- Tests applications that use Google Play Services
How to install Genymotion on Linux:
Genymotion requires “VirtualBox” because many of its functionalities are linked with VirtualBox.” Therefore, before getting Genymotion, we need to install “VirtualBox.” To download it, type the command give below and press “Enter”:
$sudo apt install Virtualbox
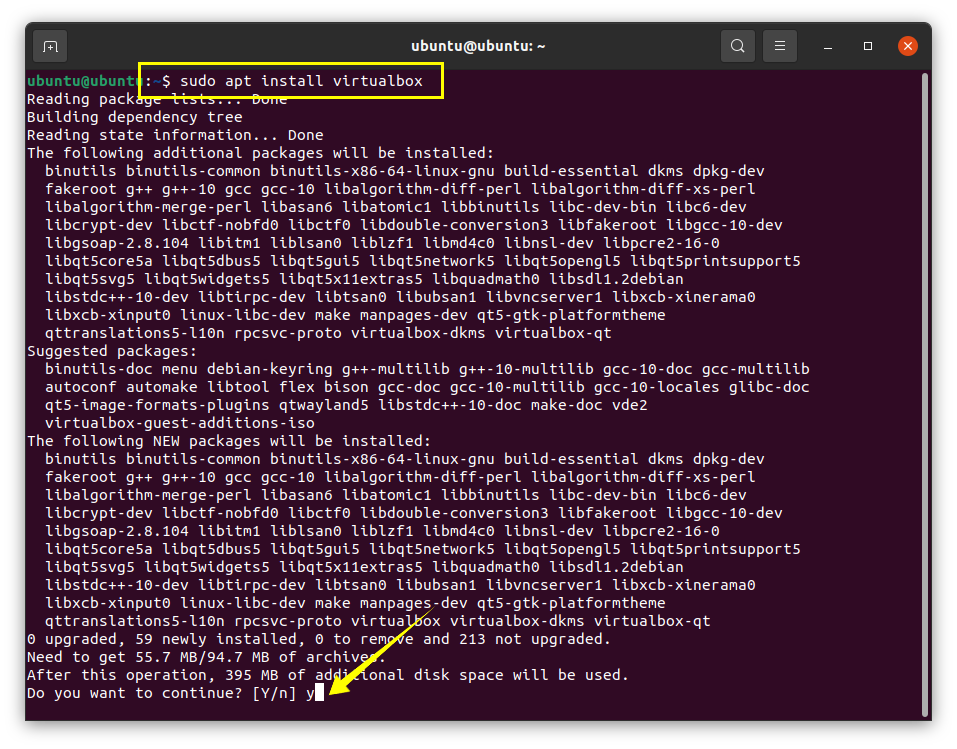
Now, download the Genymotion “.bin” file. It can be downloaded from the website
[ https://www.genymotion.com/download/ ] :
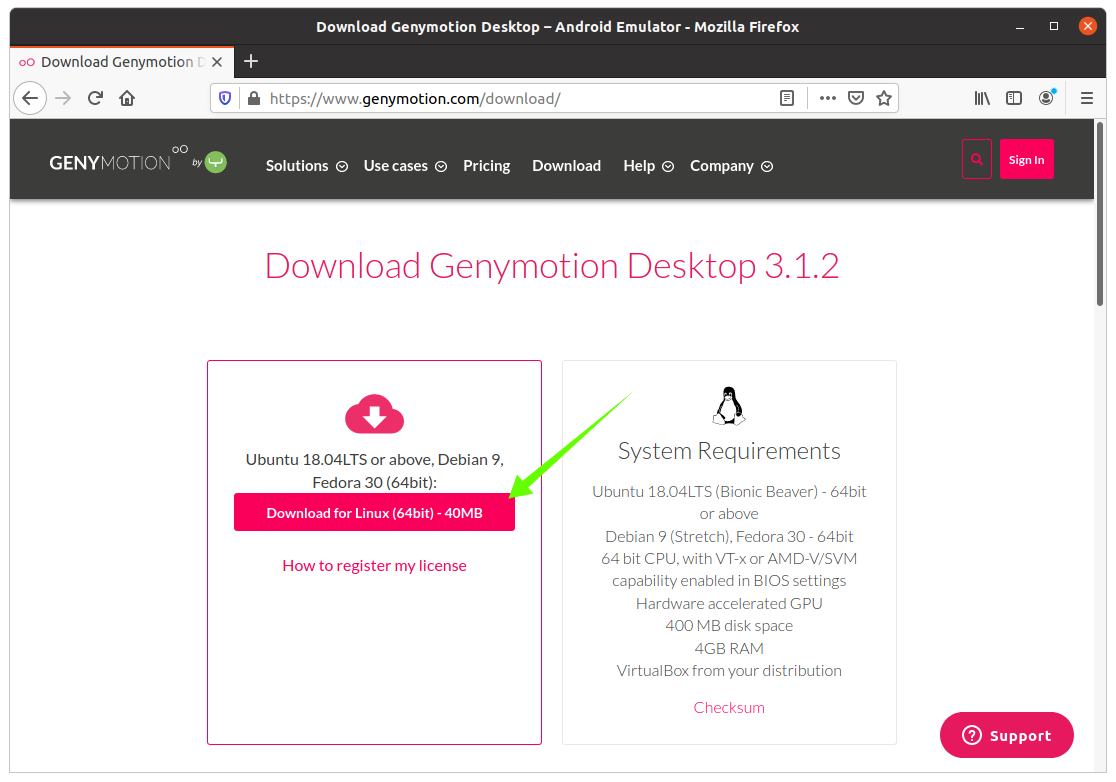
Genymotion “.bin” file will be downloaded in the “Downloads” folder. Change directory to “Downloads” folder using:
$cd/Downloads

Now, time to change the permission of the downloaded file to make it executable using the below-mentioned command:
$sudochmod +x Genymotion-3.1.2-linux_x64.bin

Now, type the given below command to begin the installation:
$./Genymotion-3.1.2-linux_x64.bin
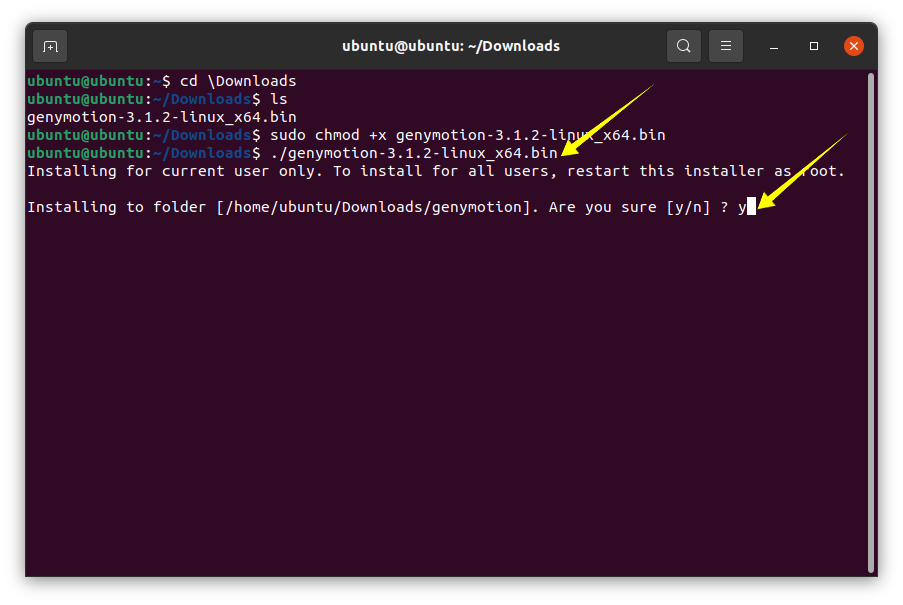
It will prompt asking for permission to install the Genymotion and press “Y/y” to continue the process.
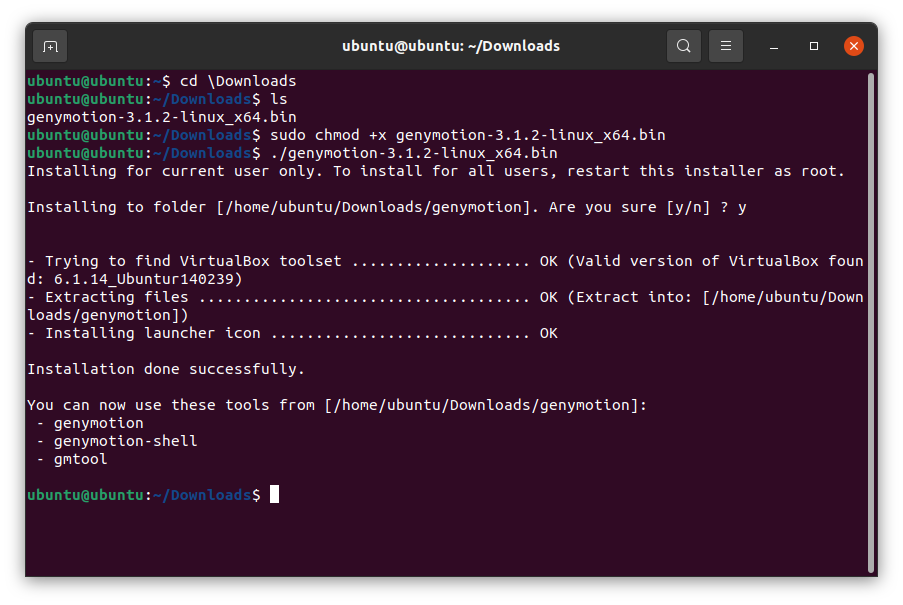
Shortly, Genymotion will be on your device; see the images below:

watch the video
Install Genymotion Android Emulator on Linux Mint (Ubuntu) ';} ?>

0 Comments